Monday 13 January 2014

TB2L7 Thinking in Pictures

BA2 define what a moodboard is and how it can be used to help develop a Digital product by creating one yourself

STARTER:

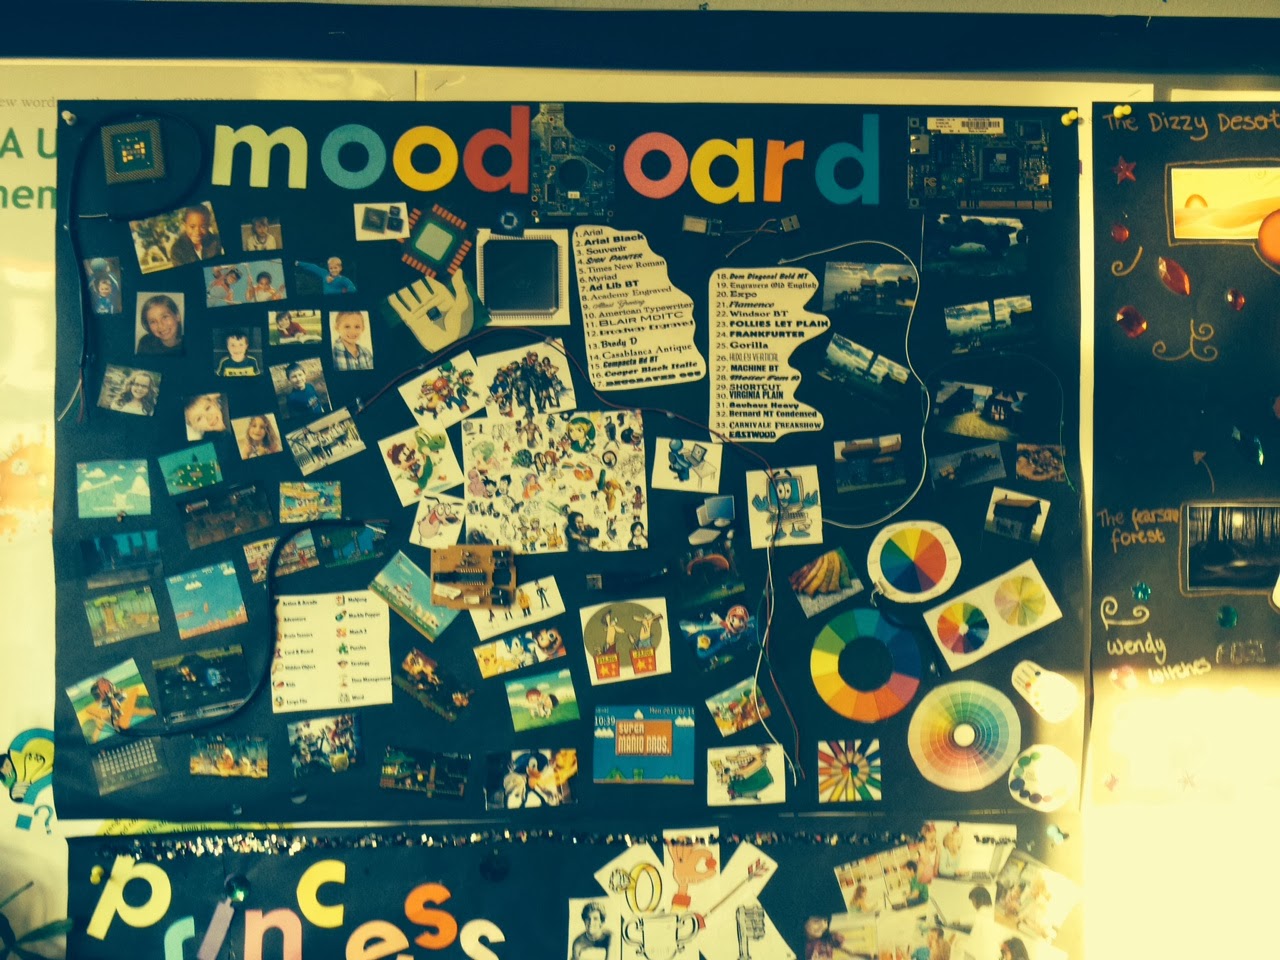
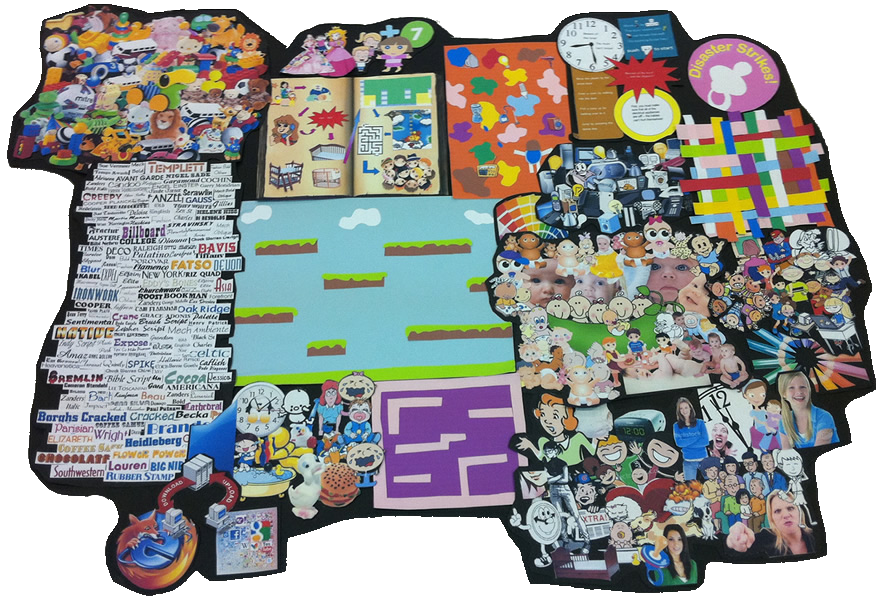
Before you start on any detailed design work you must create a moodboard. This is where you communicate your initial design ideas for your Product. You should use it to get feedback from your testers. Use the comment section of this post to submit your current understanding
  • What is a moodboard?
  • What goes on a moodboard?
  • What does not go on a moodboard?

TASK:

Imagine Hamble College is launching a new site directed purely at the students, and you are in charge of designing it.

Your Moodboard will be a loose collage to convey the type of look and feel you are going for. It can be thrown together quickly and does not force you to make decisions about smaller details such as fonts or specific colours. 
Before starting you need to come up with a list of adjectives for each board. An example might be: 
  • Dark, glossy, slick, modern, edgy, hard, aggressive
  • Soft, muted, round, layered, elegant, realistic
  • Colorful, rough, sketchy, bright, illustration
 
These adjectives serve as guidelines to pull together the elements. The words (and boards) should have strong differences, including a wide range of styles.
 
Once you have your adjectives you can start getting creative:
  • Grab bits of inspiration from anywhere you choose
  • Scan in things you find around you or search online for suitable pictures and textures
  • Sometimes it is helpful to include screenshots of other sites with a similar look and feel
  • Photogrpah colours/textures you notice around you
 
Use the Moodboard_list in O:\ICT\GCSE ICT Unit 3\TB2 B if you are still unsure


NOTE: Don’t forget to label your Moodboard with the adjectives you have chosen to work with
 
EMAIL: Your documents to me so that I can have them printed in colour for you lfenner@hamblecollege.co.uk

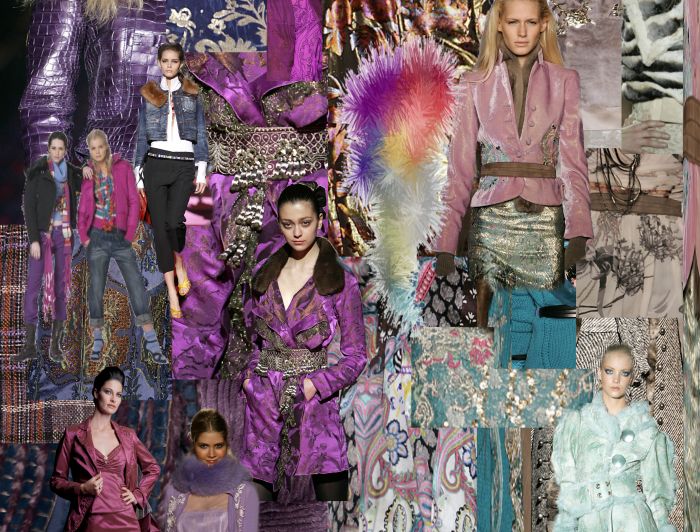
Examples of professional moodboards:


Examples of student moodboards:


PLENARY:

Designing loosely lets you brainstorm, explore and play with different styles without all the limitations a layout (and coding realities) will later impose. They also keep revision cycles to a minimum, as you can get feedback very early on in the design process.

Revisit and comment on your original posts to re-evaluate what you now know about moodboards


HWK: Bring in any material/magazines/pictures that you might be able to use on your moodboard next lesson

Wednesday 8 January 2014

TB2L5 Listen & Learn

BA2 recognise the importance and value of feedback by considering both positives and negatives

STARTER: Think, Pair, Share – When, how, why and where!

Think about your experiences on when, how, why and where you have given, received and responded to feedback

With a partner, work together, sharing ideas, discussing, clarifying and challenging each other’s thoughts
Each pair is to ‘share’ their ideas with the whole class (It is important that you need to be able to share your partner’s ideas as well as your own)

TASK 1:

Investigate an example where a Digital Product has been updated in light of feedback and through a number of iterations over the years...some of which you might even remember!

Take a trip in a time machine back to 1995....


In your pairs, using this document O:\ICT\GCSE ICT Unit 3\TB2\TB2 L5 R2 complete both of the following links for how the CBBC Website has been redesigned over time...

Blog A

Blog B

You need to make sure that you have a completed document by the end of this lesson.

TASK 2:

See if you can find any other 'old' examples of popular websites from today and compare them to how they look now... YouTube, SkySports, Facebook for example

Consider:
  • How they have changed?
  • What improvements have happened?
  • Is there anything that is 'worse' now?

The Original YouTube layout 2005

Screenshot and write about your findings in software ofyour choice.

USEFUL LINKS:

The oldest surviving web pages
How 20 popular websites looked when they launched


HWK: ShowMyHomework.co.uk - Feedback


Tuesday 7 January 2014

SB1 Images

BA2 differentiate between Bitmap & Vector images by manipulating both forms

YOU HAVE 2 HOURS TO COMPLETE THESE TASKS, WORK THROUGH AT YOUR OWN SPEED BUT YOU MUST COMPLETE ALL TASKS THIS WEEK

STARTER:

Have you ever heard of Bitmap or Vector images? Where have you heard of them - can you relate what they mean AND give examples?


TASK 1 - Bitmap:
 
Work through the worksheet found in O:\ICT\GCSE ICT Year 10 2013\SB1 FEN\Lesson 5 Working with images (or below) to gain an understanding of the basic tools used in Photo Editing software (Serif PhotoPlus)
 
USE THE PROVIDED IMAGES!


TASK 2 - Vector:

 
Create a simple cartoon character using Serif DrawPlus.
What tools do you recognise? What are the differences in the software?

Vector based Image
 
TASK 3 - Bitmap:
 
Using the skills you have just gained, create your own image in the same way - making sure you have used - layering, cropping, colour balancing etc. You are aiming to create a Montage.

 
Photo Montage
 
 
HINT: YOU MAY WANT TO USE THIS SOFTWARE FOR YOUR CONTROLLED ASSESSMENT...